# Fingerprint calibration issues after replacing screen module
## TL;DR
During FLESH CHART stage, ditch that stupid stripey flesh cube and use upper half of your thumb in horizontal position - that is, your left hand thumb pointing to the right. [Source of this revelation](https://xdaforums.com/t/guide-for-calibration-finger-print-after-loss-data-calibration.4132961/post-84685561)

## Replacing the screen
You usually do it when your screen is wrecked by using the rubbish plastic case included with your phone. An average person either ships the phone to ASUS repair center, for a million-dollar repair, or throws the phone out entirely. More sentimental elements (like me) will try to do the repair on their own.

The fingerprint sensor is also included in the screen, and its inner workings are really sophisticated - kudos to the guys at [Goodix](https://www.goodix.com/en) company, they must really be some wizards in their craft.

Our little repair venture ruins the calibration parameters, carefully-prepared (NAH) in ASUS Factory. The calibration procedure requires us to use special calibration app **ZS590KS_FingerPrintCalibrationAssistantTool.apk**, that as of today, can still be downloaded from ASUS Support site. We also need special silicone cubes provided by ReLife, that proudly imitate a skin colors:

Install the tool app, it will appear in your launcher as Factory Test. Now, according to **ZS590KS_FingerPrint_Calibration_SOP_V1.0.pdf**, we need to prepare three cubes:
- FLESH FLAT - flesh-colored with square cutout
- FLESH DARK - same, but black
- FLESH CHART - cube with vertical stripe pattern
Everything goes perfectly, until the third step. No matter what I tried, always ended up with an error that hauntingly says:
`1524 SCREEN RELATED PARAMS ERROR`
### My frustration recipe
- I repeated the procedure with both the blue, and flesh colored cubes.
- There is a [single thread on XDA](https://xdaforums.com/t/fingerprint-sensor-not-working-after-installing-new-screen.4677189/), where some dude tried to tackle this by cutting the cube to the perfect size of on-screen square. For me, no success whatsoever.
- Tried slightly adjusting the angle of cube
- Added some weight on top of the cube in hopes to get better registration
After 3 hours, and like 100 attempts, in total resignation I slapped my thumb into the square, as explained by [mysterious Mike in a completely unrelated phone forum](https://xdaforums.com/t/guide-for-calibration-finger-print-after-loss-data-calibration.4132961/post-84685561). Pressed NEXT, put tip of my left thumb, pointing right, completely covering the white circle.
**And what do you know, it passed!** That huge "0x00 PASS" was like a melody to my ears. Thank you, mysterious Mike! I honestly have no clue what is going on here. Guess the fingerprint grooves on top of the thumb somehow match vertical pattern expected by the app, and allow the step to complete.
As a bonus, the fingerprint recognition is like 2 times better, than it ever was before. Great job on calibrating this slab in the factory!
```
Mike, [06.03.21 20:31]
You have to use the upper half of your thumb
Mike, [06.03.21 20:32]
You place your finger vertically, it has to be straight up and your press the upper half on the sensor, you have to cover it all
Mike, [06.03.21 20:32]
Gently, not too hard, but firm
Mike, [06.03.21 20:34]
It helps to press your index finger to the bottom edge of the phone as it helps you to press the thumb properly
```
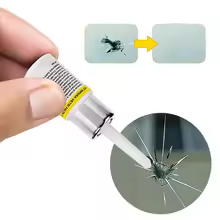
## Less-invasive methods for masking cracks
My Zenfone screen got wrecked pretty early during the life of phone. To keep it from falling apart and looking like crap, I tried filling the cracks with UV-curing resin. That's the typical windshield cracks filler from Aliexpress. The resin happily soaks into the cracks, the excess can be easily scraped from screen using included razor blade. Use a proper UV light source, like nails lamp - that tiny UV flush-light included with resin is useless. The therapy didn't remove the cracks completely, but at least I wasn't getting so distracted by depressing spider marks on my screen.
## Other things to keep in mind
- After unsuccessful calibration, the fingerprint recognition might suddenly start working. However, it's lost after reboot. Only finishing successfully writes the parameters into memory.
- Since ASUS completely removed any way to unlock bootloader (despite their promise to bring it back), I will never buy anything from the company again.
- Disassembly tutorials show ungluing the battery by prying it with a tool, which - by bending - turns it into an electro-waste. Battery can be unglued non-destructively by heating the screen with hairdryer, and firmly pulling by the semi-transparent tabs sticked to the edges of battery. Thanks to HAMMER-guys for this protip.

